

Dive into the world of DeFi and cryptocurrencies with our easy-to-follow 2023 guide on configuring MetaMask. Learn how to securely set up your wallet, manage digital assets, and interact with dApps on the Ethereum blockchain.
Contents
- Why do you need MetaMask?
- MetaMask Timeline
- Creating a MetaMask Account
- Step 1: Installing MetaMask to Your Browse
- Step 2: Installing MetaMask on Mobile Devises
- Step 3: Setting Up a MetaMask Account
- Step 4: Creating a MetaMask Wallet
- Step 5: Creating Your Password
- Step 6: Watch Video Prompt
- Step 7: Storing Your Secret Recovery Phrase
- Step 8: Confirm Your Secret Recovery Phrase
- Adding Custom Networks to Metamask
- Conclusion
Why do you need MetaMask?
MetaMask is a digital wallet that allows users to interact with decentralized applications (dApps) and the decentralized finance (DeFi) ecosystem on the Ethereum blockchain. It acts as a bridge between your regular web browser and the Ethereum network, allowing you to securely store and manage your private keys, as well as easily interact with smart contracts on the Ethereum blockchain. Without MetaMask, you would not be able to access the full functionality of DeFi, dApps and Web3. This follows on from our Introduction to DeFi post.
If you’re looking to jump into the world of decentralized finance (DeFi), or want to store and transfer Ethereum-based ERC20 tokens, you will first need a compatible wallet. Metamask is one of the most popular wallets, with over 30 million active users. . Additionally, MetaMask also support the newer token standard ERC-721, Non-Fungible Token (NFTs) which have become increasingly popular in the DeFi and digital art space.
MetaMask Timeline
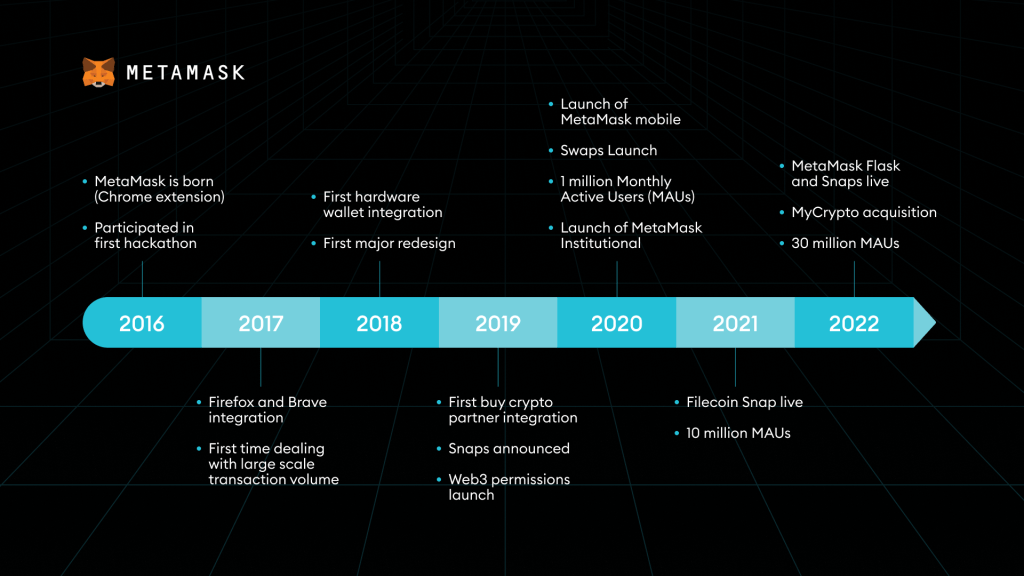
- In 2016: MetaMask was Launched by ConsenSys as a browser extension for Chrome and Firefox. This allowed anyone with a wallet to interact with the Ethereum Blockchain and Decentralized Applications (dApps)
- In 2018: MetaMask integrates with decentralized exchanges (DEXs) to allow users to trade directly from their wallets.
- In 2020: MetaMask launches its mobile app for iOS and Android, allowing users to access dApps and the Ethereum network on the go.
- In 2022: MetaMask launches MetaMask swap, a built-in decentralized exchange to make trading more convenient for userss.
The main reason for MetaMasks launch was to provide an easy-to-use and secure way for users to interact with the Ethereum blockchain and decentralized applications (dApps). Before MetaMask, the process of interacting with the Ethereum blockchain and dApps was complicated and required users to run a full Ethereum node on their computer. This was a challenging task for the average user and required a certain level of technical expertise. MetaMask was created to make it easier for users to access the Ethereum network and dApps without needing to run a full node by acting as a bridge between the user’s web browser and the Ethereum network.
Creating a MetaMask Account
Now that we understand what MetaMask, its importance to the DeFI space and how its changed overtime. It is time to help you create your very first MetaMask Account. Below are the steps that will be discussed and by clicking on the contents you can skip to the desired step you want.
Step 1: Installing MetaMask to Your Browse
Go to the MetaMask website (https://metamask.io/). Click on the “Download For Chrome (icon)” button and then follow the download prompts. The website automatically detects what web browser is being used and changes the icon dependent on the browser.
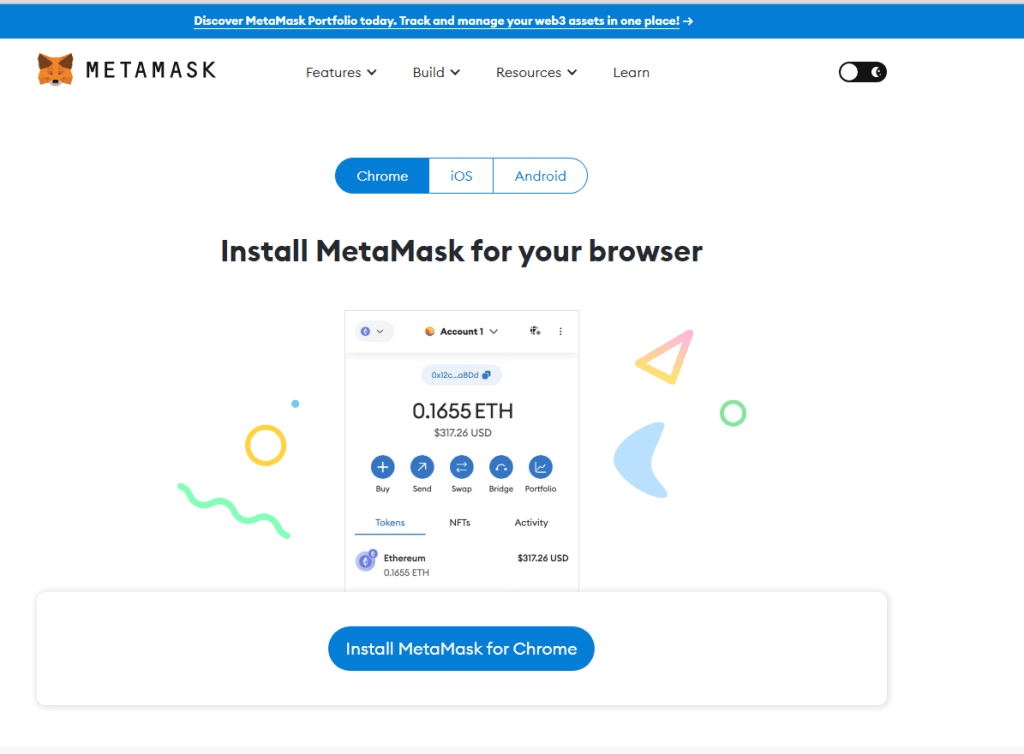
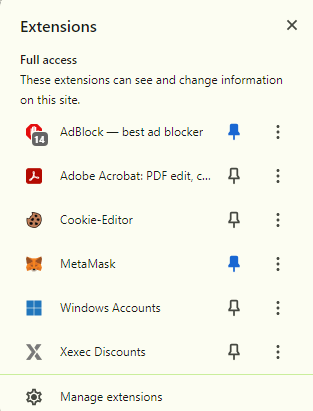
Once the extension is added to your browser, click on the “Puzzle icon” and then click the “Pin icon” next to MetaMask to pin the extension to your chrome browser. This is recommended as it provides easy access.
Step 2: Installing MetaMask on Mobile Devices
You can also install the MetaMask mobile app for iOS or Android by visiting their respective app stores. I will show you how it’s done on IOS devices.
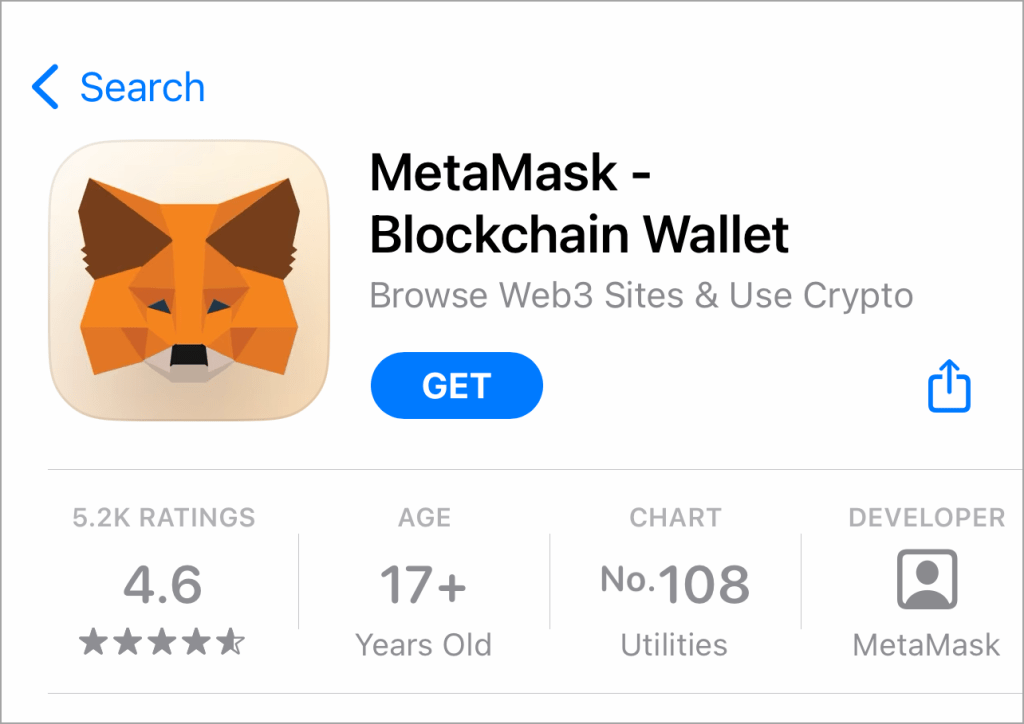
First go to the App Store, search MetaMask, once you see the an app called “MetaMask – Blockchain Wallet” click the “GET” button to download it onto your device.
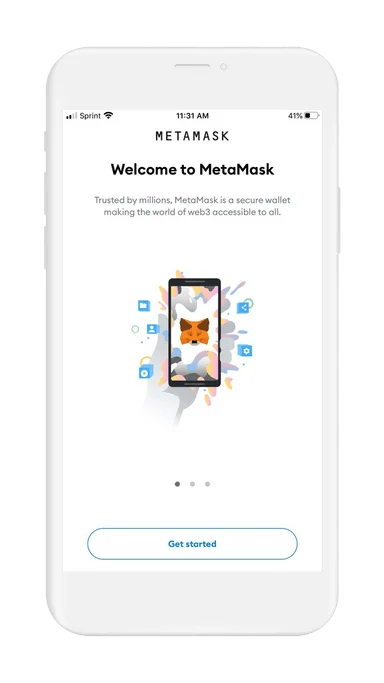
Once downloaded, open the MetaMask app which can be found on your home screen or by searching for it. With the app open, press “Get started”.
Step 3: Setting Up a MetaMask Account
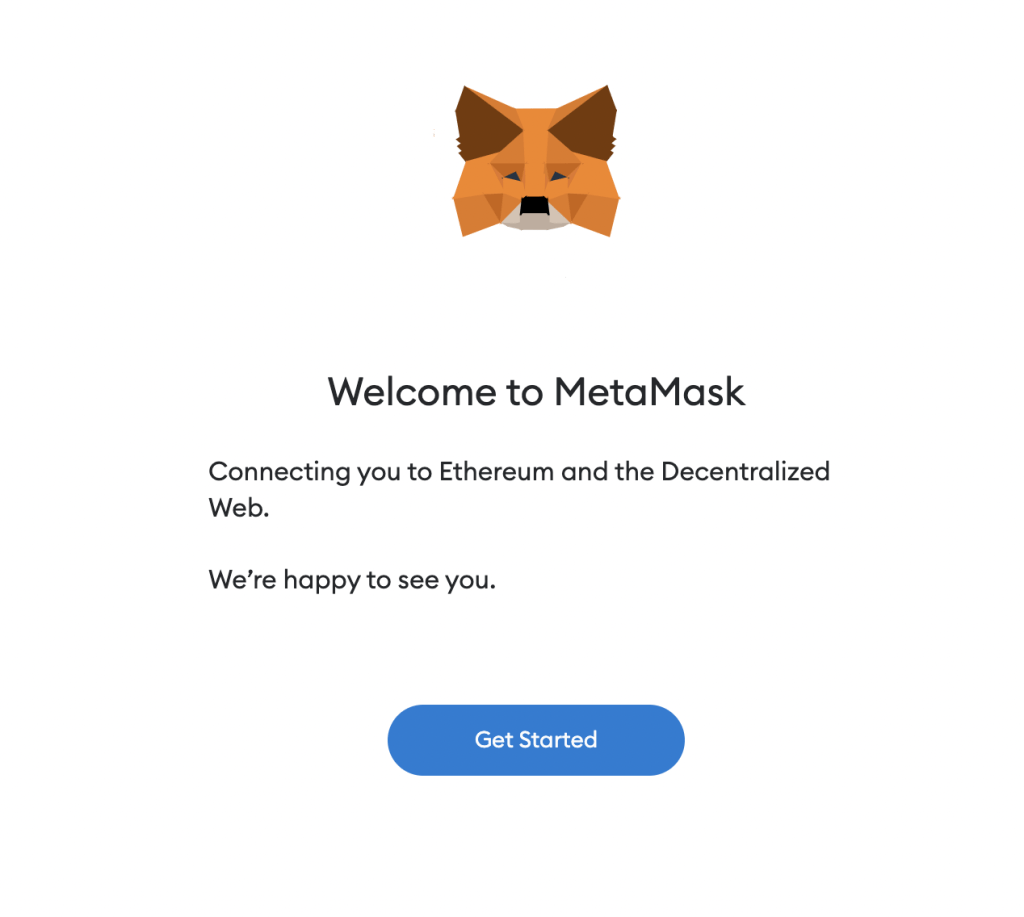
Once the MetaMask extension has finished downloading a new tab should pop up with the “Welcome to MetaMask” message and at the bottom of the page you should see a “Get Started” button, if this doesn’t come up you can simply click on the MetaMask Extension give it a few seconds and new tab will open.
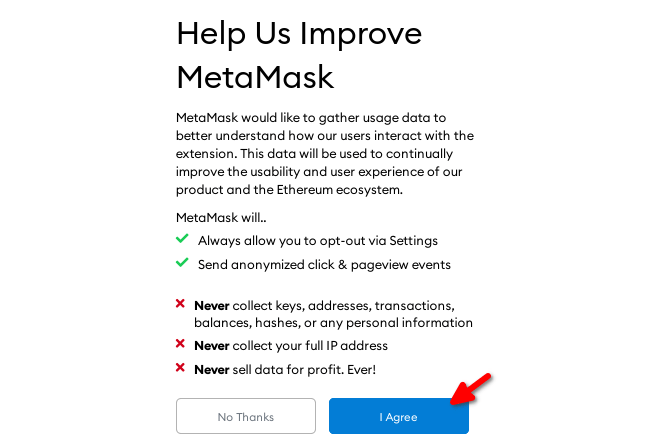
After clicking the “Get Started” button you will be redirected to a new page. This page gives you an option to allow MetaMask to gather your data, you can decline this if you wish for MetaMask not to gather your usage data.
Step 4: Creating a MetaMask Wallet
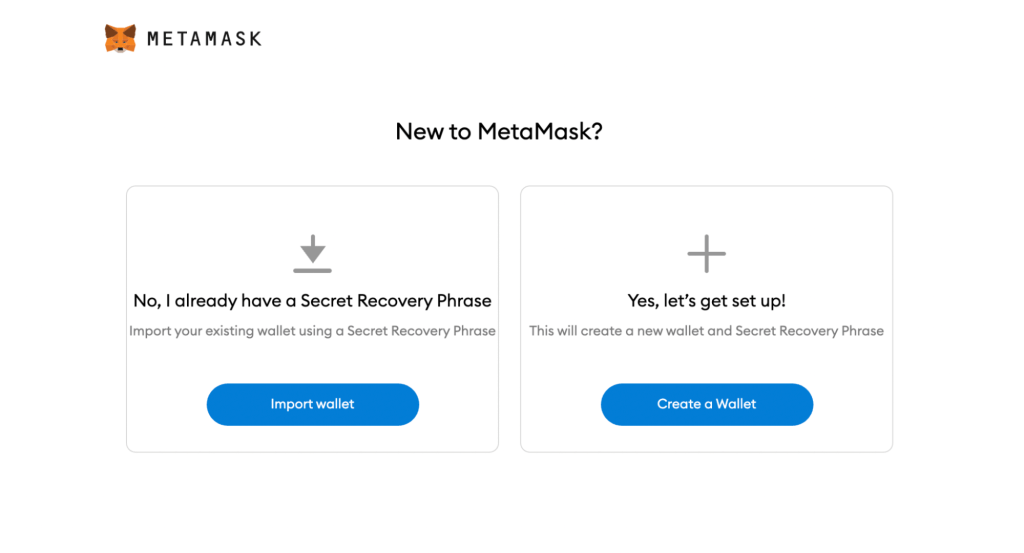
You will now be given two options to select from, “Import wallet” or ” Create a wallet“. If this is your first wallet simply click on the “Create a Wallet” button.
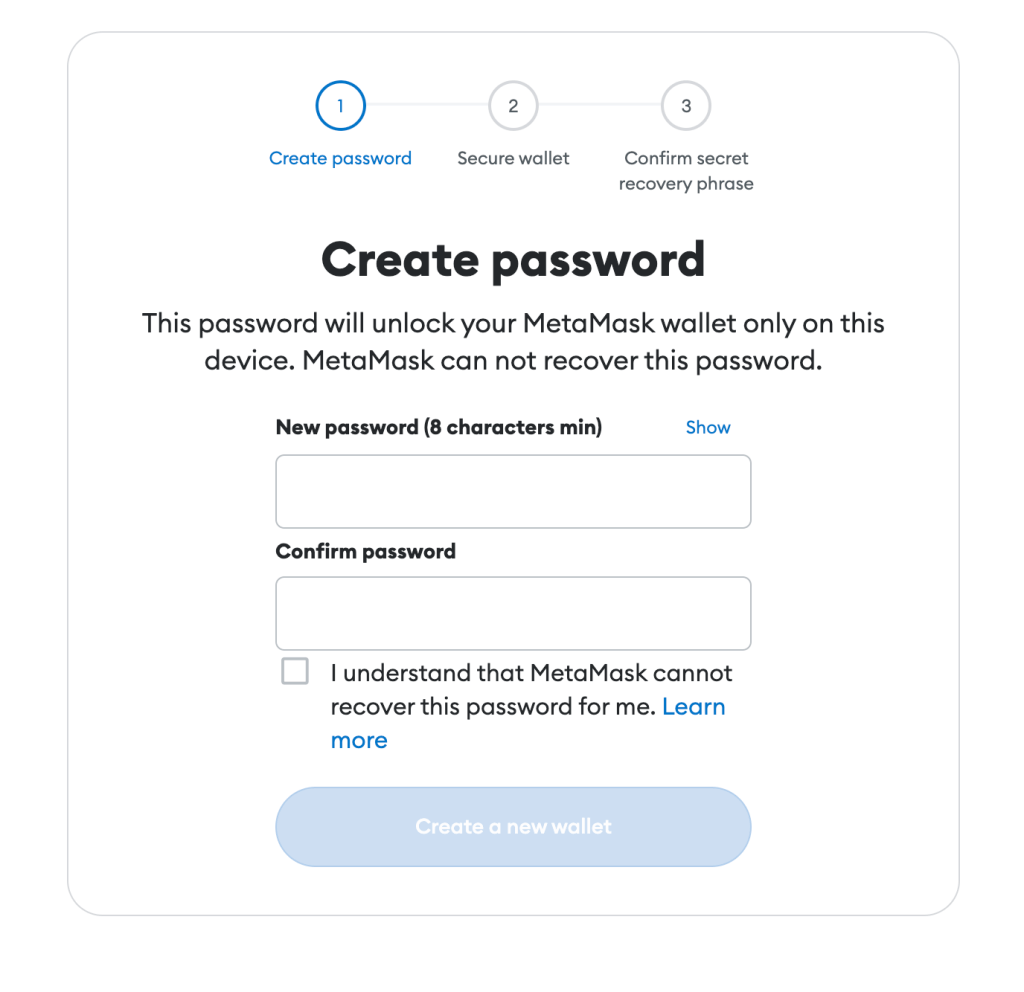
If it is your first time, you will now need to provide a “New password” with a minimum of 8 characters, then “Confirm Password“, ensure that both passwords match. Once that is done click on the box to agree to the Terms of use and select Create which shouldn’t be greyed out anymore.
Step 6: Watch Video Prompt
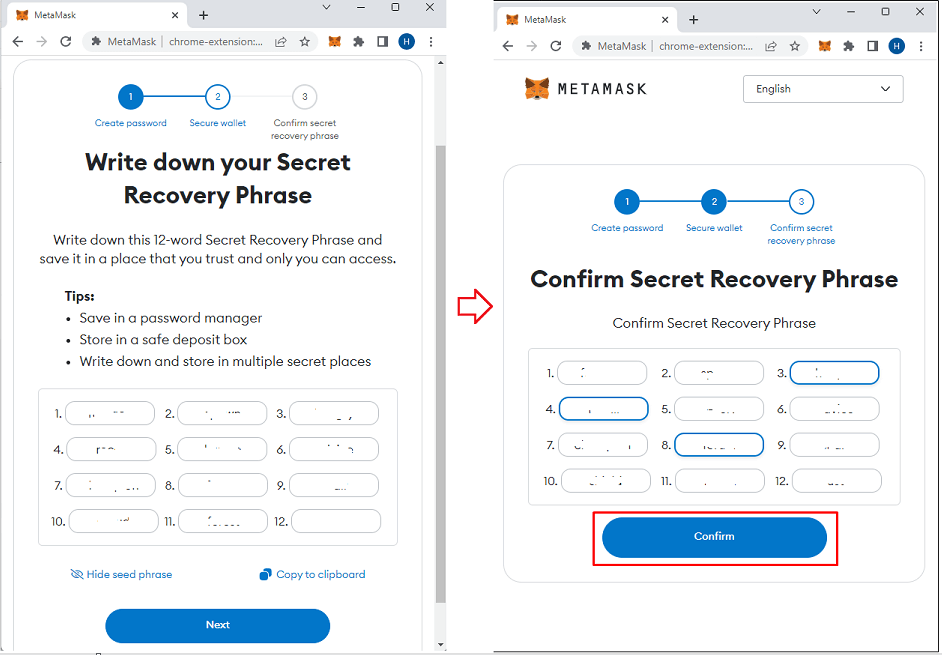
In this section you will be taught what the “Secret Recovery Phrase” is and why it is important for securing your wallet. Watch the video which will give you a little more insight into MetaMasks security.
One you have understood this step click the “Next” button. It is crucial to safely store the secret recovery phrase for your MetaMask wallet as it is the only way to access the funds in the event that you lose access to the wallet. It is recommended to write the phrase down and store it in a secure location, such as a safe or a safety deposit box. On the next page you will need to confirm the secret recovery phrase. Once the fields have been field click the “Confirm” button.
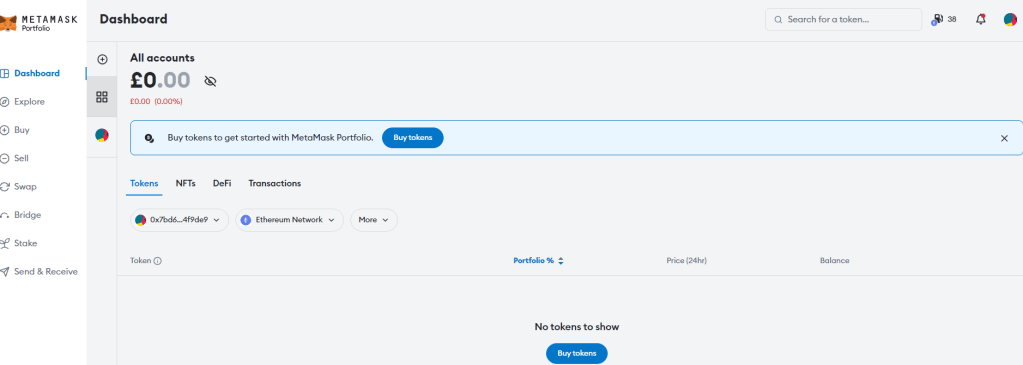
One this has been completed and the SRP has been confirmed to be correct, you will be
shown a congratulations page followed by your MetaMask page. You can now officially add
crypto to your MetaMask wallet.
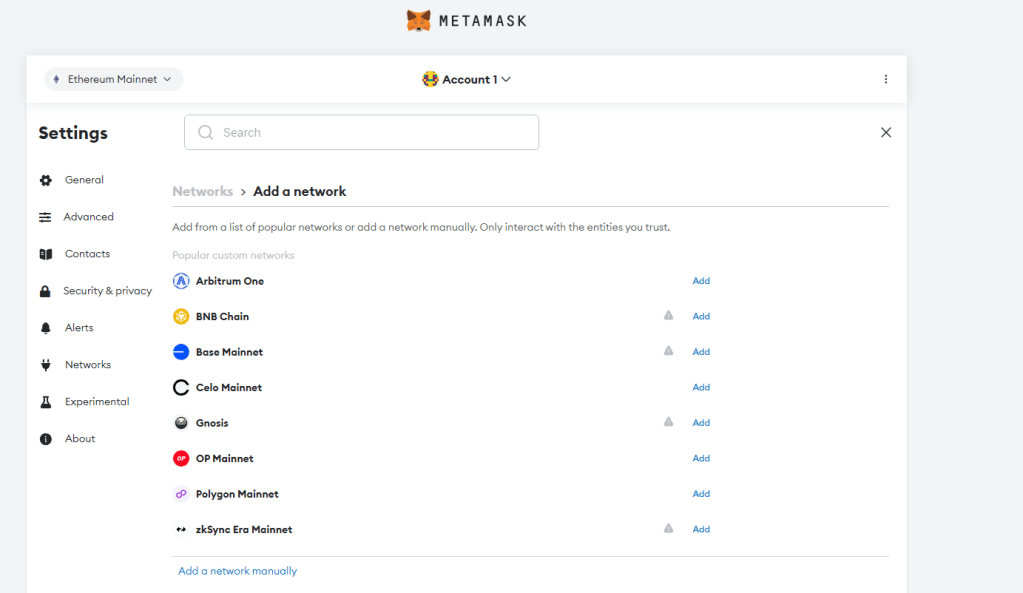
Adding Custom Networks to Metamask
Originally MetaMask was created as an Ethereum wallet, but now, other layer 2 chains have are compatible with the wallet. To add other blockchain networks like Binance Smart Chain or Avalanche to MetaMask:
- Open MetaMask
- Click on “The top left corner icon of your metmask interface“
- Select “Add Network” from the tabs on the left
- Enter the following information for the network:
- Network Name
- New RPC URL
- Chain ID
- Currency Symbol (Optional)
- Block Explorer URL (Optional)
- Once all the information is entered correctly, select “Add a network“
- The new network will now be added to the list of available networks in MetaMask.
Conclusion
MetaMask is a great choice for those who want a crypto wallet that can connect to multiple networks, making it a versatile option for buying cryptocurrency or NFTs. To enhance security, many users choose to use MetaMask in conjunction with a hardware wallet like Ledger.
Another useful feature is the ability to connect MetaMask with decentralized exchanges like Uniswap, which is something to look into after setting up your MetaMask wallet.

One thought on “Configuring MetaMask in 2023: A Simple Beginners Guide”